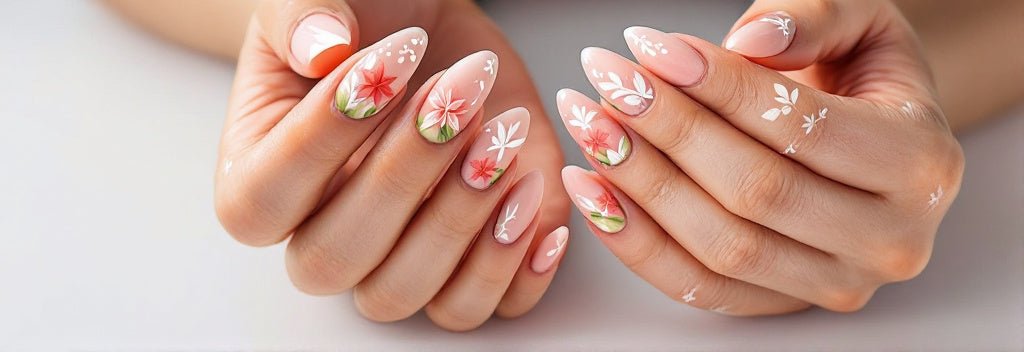
💅 How to Apply Press-On Nails Like a Pro (And Make Them Last!)
Compartir
If you’ve ever had your dream press-ons pop off mid-latte or slide sideways before a selfie… you’re not alone. 🙃
But here’s the secret: it’s not your nails — it’s your prep.
Even the most stunning set (hi, Nexus Nails 👋) needs a solid base to truly slay. So today, we’re sharing the pro-level prep and application routine that keeps your press-ons secure, seamless, and salon-worthy.
Whether you're a total newbie or a press-on princess, this guide will have you applying your nails like a seasoned nail tech.
✨ Why Prep is Everything (Seriously)
Let’s get one thing straight: oily, uneven nail beds = short wear time.
Without the right prep, even luxury handmade nails won’t last more than a day or two.
But with the proper steps? You’re looking at 7–14 days of secure, natural-looking wear.
That’s why we made this guide. Because your nails deserve to be seen — not sliding into the void.
🧼 Step 1: Start with a Clean Slate
Before you even open your Nexus Nails box, do this:
- Remove old polish – even if it’s clear
- Wash your hands with soap and warm water
- Dry completely – no shortcuts!
Why? Oils, lotions, and leftover polish create a barrier between your natural nail and the adhesive.
🧊 Step 2: Shape & Smooth Your Natural Nails
Every press-on set includes a mini file and cuticle stick — use them!
- Gently push back cuticles to create a clean canvas
- Lightly buff the surface of each nail to remove shine
- File edges so your natural nails match the curve of the press-ons
This step helps your press-ons sit flush and reduces lifting.
🍷 Step 3: Wipe It All Down
Use the included alcohol wipe to cleanse your nail beds.
This removes any invisible oils and dust from filing — your glue or adhesive tabs will grip better.
No alcohol wipe? A cotton pad with 70%+ isopropyl alcohol works too.
✨ Step 4: Choose Your Fit (Don’t Skip!)
Each handmade Nexus Nails set includes 10 custom-shaped nails. Before applying:
- Lay out the nails in the correct order (thumb to pinky)
- Press each tip to your nail and ensure the fit is snug
- If one is too tight, size up and file the sides slightly
Pro Tip: Nexus Nails can be slightly reshaped if needed. Just file gently for a perfect fit.
💌 Step 5: Apply with Glue or Tabs — Your Choice
You’ve got two options depending on your vibe:
Option 1: Nail Glue (For 1–2 Weeks of Wear)
- Apply a small dot of glue to your natural nail
- Add a tiny dot to the back of the press-on
- Press firmly for 30 seconds
Don’t skip the pressure hold — it’s what locks in the bond.
Option 2: Adhesive Tabs (For Short-Term Slay)
- Peel the correct tab size and stick it on your nail
- Press and smooth the tab
- Place the press-on nail and press firmly for 30+ seconds
Perfect for events, photoshoots, or commitment issues. 😉
👑 Pro Tips for Maximum Longevity
✅ Avoid water for the first 2–3 hours post-application
✅ Apply at night for best results — less hand activity
✅ Keep nail glue in your bag for emergency reapplication
✅ Reuse your set by removing gently (soak in warm soapy water)
💬 What Our Customers Say
💅 “I followed the Nexus guide and wore mine for two weeks — no lifting!” — Rachel D.
📸 “Did a whole photoshoot with glue tabs. They held through multiple outfit changes.” — Kim Y.
🛍️ “It’s like a salon set but way faster and way cheaper.” — Morgan T.
📦 Every Nexus Nails Set Includes:
✔️ 10 custom-fit press-on nails
✔️ Nail glue & adhesive tabs
✔️ Mini file & cuticle stick
✔️ Alcohol pad
✔️ Easy-to-follow instructions
✔️ And of course… the aesthetic ✨
🌷 Confidence Starts with Prep
You’ve invested in handmade nail art — now give it the foundation it deserves.
With just 10 minutes of prep and the right technique, you’ll have a mani that turns heads and holds strong. Whether it’s a spring picnic, a hot date, or your everyday glam — your press-ons will be there to serve.
You + Nexus Nails = Main Character Energy.
👉 Ready to apply like a pro? Shop our latest press-on collections here and put this guide to good use 💖
